
Admins in the domain can export the organization’s data to a Google Cloud Storage archive and download it from there. The Data Export tool can be used to export all supported data for all users.
Requirements to export your organization’s data:
- If your domain was created more than 30 days ago, you need to hold an account in your domain for 30 days or more.
- You must be signed in as a super administrator for this task.
- Have 2-Step Verification (2SV) turned on for your account (2SV enforcement isn’t required). 2SV is required only for the admin performing the export.
If the organization has more than 1 super admin, all the admins will receive an email that a data export is pending, and the tool starts exporting data 48 hours after you start the export process. The waiting period helps provide security for the organization’s data.
However, there are some limitations in this method:
- The Data Export tool doesn’t export data for any user accounts that were created within 24 hours before the tool starts exporting data. This waiting period also provides security for the organization’s data.
- You should have your last successful export complete more than 30 days ago. However, if your last export was unsuccessful, you can start a new one immediately or run a remediation export to get the missing data.
- Only one export can run at a time.
- Organizations with more than 1,000 users, need to contact Google Cloud Support to temporarily allow the Data Export tool.
Steps to export a user`s data in your organization:
- Sign into your Google Admin Console using an account with super administrator privileges.
2. In the Home page, under Tools, click Data Export.
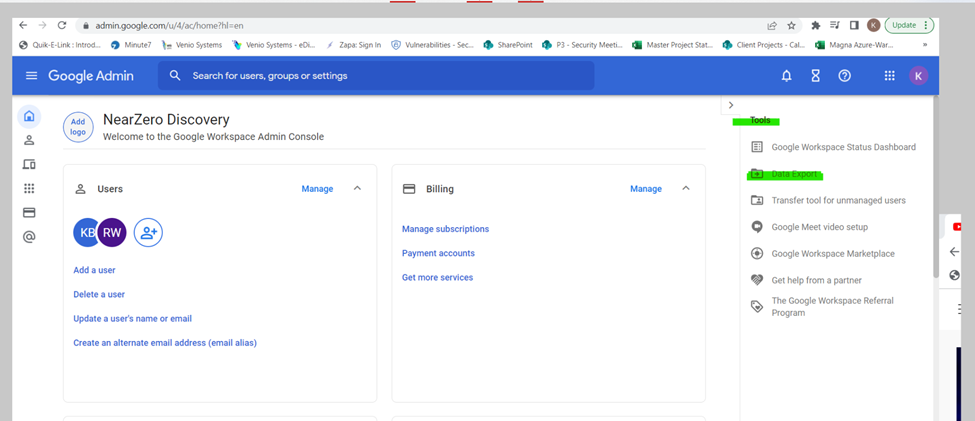
3. Click Start Export.
Google articles say that data exports typically take 72 hours but can take up to 14 days depending on the size of your data export. Only the admin who started the export gets an email notification when the process is complete, but all super administrators can view the export.
4. In the email notification, you get a link to access the archive. Also, you can find the archived data under Data Export tool. You then will need to review your data export report for errors. The Data Export page will show one of the following status indicators for the export archive:
Failed: No data was exported.
Complete with errors: Some data is missing from the archive.
Complete: All data was exported.
The export report in Cloud Storage includes a failure summary if any errors occurred. If the export had errors that prevent you from downloading the data you want, you can try exporting only the missing data. This process is called remediation under the Data Export tool. If there are still export errors (missing data) after the remediation process, admins can retry the export again. Admins can continue remediating archives until they export all data.
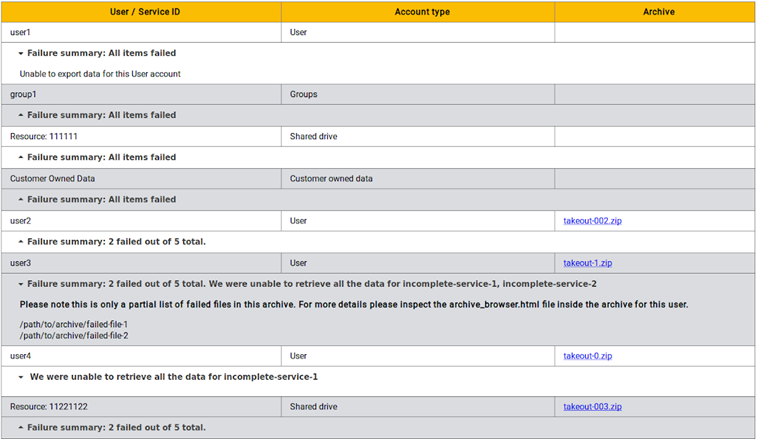
If any export errors occurred, the report includes the following details:
- User/Service ID
- Account type
- Archive
- Failure summary—The number of files that were exported and the number that weren’t exported. To see a list of files that weren’t exported, click the arrow to the left of the failure summary.
Here is an example report with export errors:
When the exported data is ready to view and download, you can see a root folder that contains a list of the user folder. Each folder contains a zip file. The exported data is available in Cloud Storage for 30 days and then it’s permanently deleted. Comparing Microsoft eDiscovery tool, this is a limitation.
Next week, we will be discussing Google Suite’s Vault and it’s eDiscovery Features.
Would you like to learn more about our services? Email [email protected] or call 289-803-9730. We would be happy to share more details about our self-service or fully managed eDiscovery services!


