All organizations need to learn about Data Compliance Management to ensure that their policies and regulations comply with industry and security standards. Data Compliance Management involves the procedures and policies to reduce the risk of violating data and IT infrastructure. How the organizations approach compliance management will depend on the standards that organization must meet. To comply with legal or regulatory requirements and standards, you need to know your data, detect the risk of the activities, protect your data, manage your data lifecycle, encrypt your data, control the encryption keys, and archive all types of data.
Microsoft users can use the capabilities in Microsoft Purview risk and compliance solutions to govern the data. Integrated solutions in Microsoft Purview have been designed to protect sensitive information, manage data lifecycles, reduce insider risks, and …. Some of the Microsoft Purview tools are listed as following:
- Data Loss Prevention
- Data lifecycle management
- Information protection
- Information barriers
- Insider risk management
- Records Management
Organizations can use Microsoft Purview Data Lifecycle Management (formerly Microsoft Information Governance) tool and capabilities to retain the content that they need to keep, and delete the content that they don`t.
After understanding how to use the retention policies and retention labels, organizations should identify the workloads that need a retention policy and whether they need to create retention labels for exceptions. It is highly recommended to have an approved Data Lifecycle in organizations. The most used retention policies are for Exchange, SharePoint, Teams, Microsoft 365 Groups, and Yammer. You can configure exceptions for documents and emails. Also, you can use retention labels for different types of content that require different retention settings in Microsoft Purview Data Lifecycle Management to retain data.
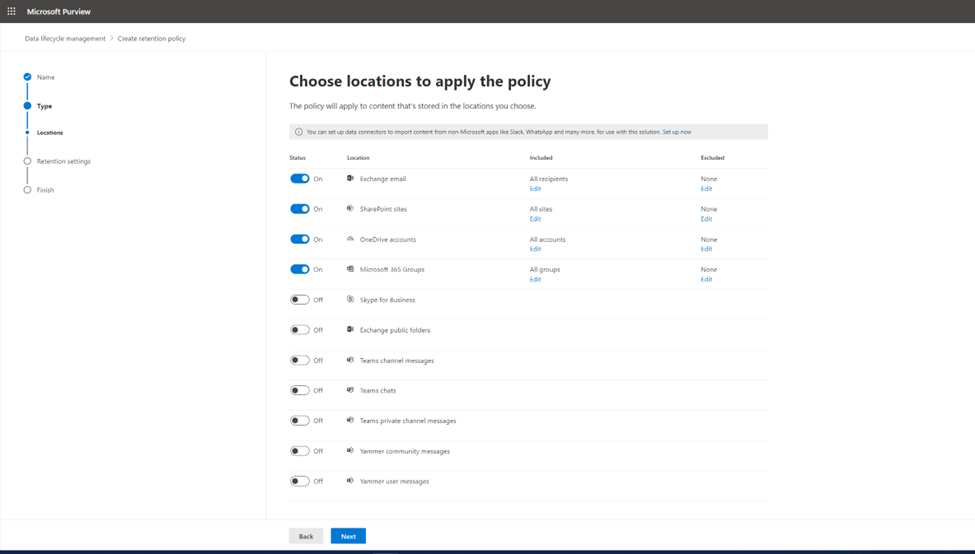
Retention policies can be applied to these locations:
- Exchange email
- SharePoint site
- OneDrive accounts
- Microsoft 365 Groups
- Skype for Business
- Exchange public folders
- Teams channel messages
- Teams’ chats
- Teams private channel messages
- Yammer community messages
- Yammer user messages
By default, the tenant admin (global administrator) has access to Data Lifecycle Management tool and can give compliance officers and other people access without giving them all the permissions of a tenant admin. To grant permissions for other users, Microsoft recommends adding users to the Compliance Administrator admin role group or create a new role group and add the Retention Management role to this group. For a read-only role, View-Only Retention Management can be created.
There is a maximum number of 10,000 policies per tenant for any configuration. This maximum number includes the different policies for retention, and other policies for compliance such as:
- Policies for DLP
- Information barriers
- eDiscovery holds
- Litigation holds
- In-Place holds
- Sensitivity labels
Within this 10,000 policies limit, there are also some limits on the maximum number of policies for retention per workload:
- Exchange (any configuration): 1,800
- Per mailbox: 25 is the recommended maximum before performance might be impacted; 50 is the supported limit.
- SharePoint or OneDrive: (all sites automatically included): 13
- SharePoint or OneDrive (specific locations included or excluded): 2,600
You can use multiple policies to avoid exceeding maximum numbers but always remember to avoid complication.
How to Create a Retention Policy
From the Microsoft Purview compliance portal, select Data lifecyclemanagement > Retention Policies.
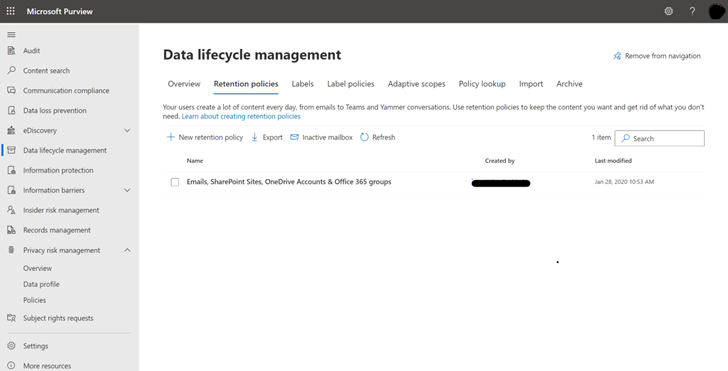
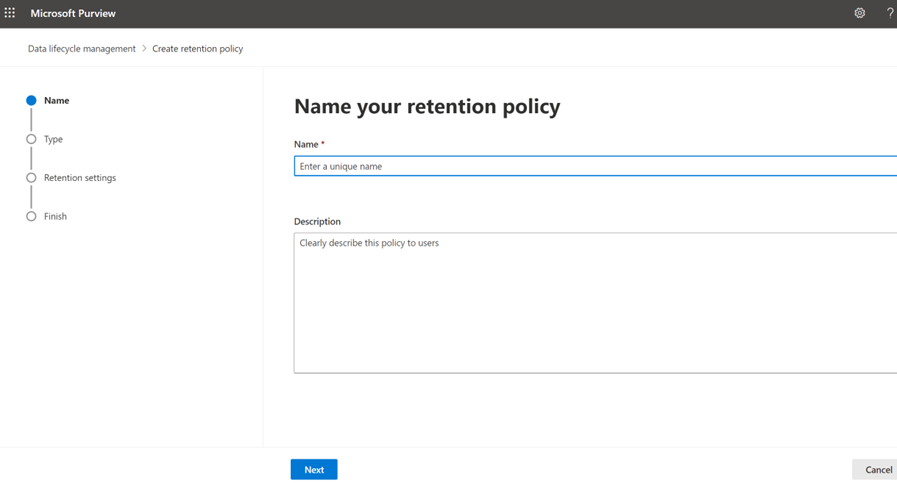
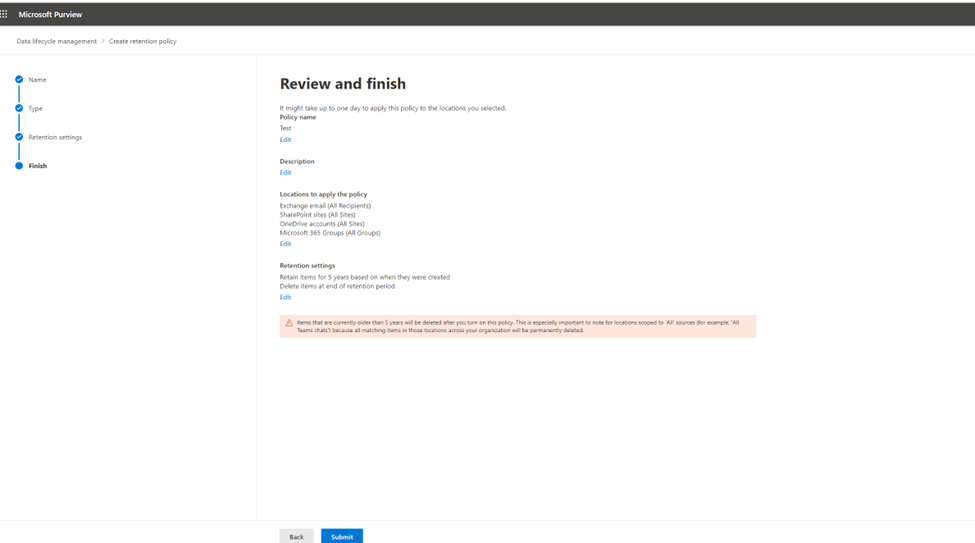
Select New retention policy to start and choose a name.
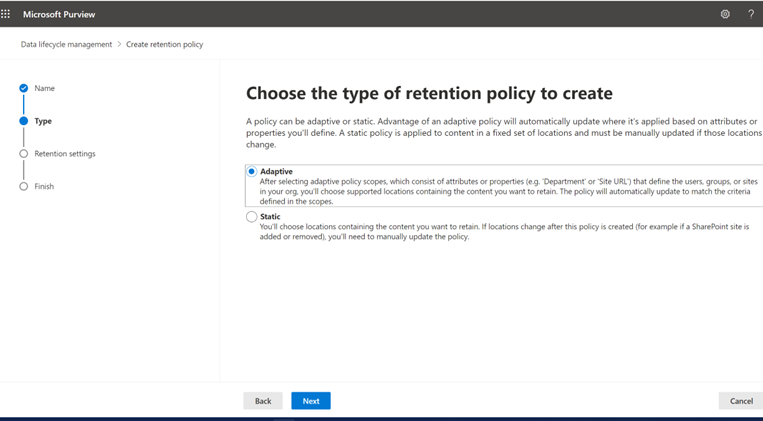
In Choose the type of retention policy to create page, select Adaptive or Static, depending on the choice you made. If you haven’t already created adaptive scopes, you can select Adaptive,but because there won’t be any adaptive scopes to select, you won’t be able to finish the configuration with this option.
Depending on your selected scope:
- If you chose Adaptive: On the Choose adaptive policy scopes and locations page, select Add scopes and select one or more adaptive scopes that have been created. Then, select one or more locations. The locations that you can select depend on the scope types added.
- If you chose Static: On the Choose locations to apply the policy page, select one or more locations.
In Decide if you want to retain content, delete it, or both page, specify the configuration options for retaining and deleting content.
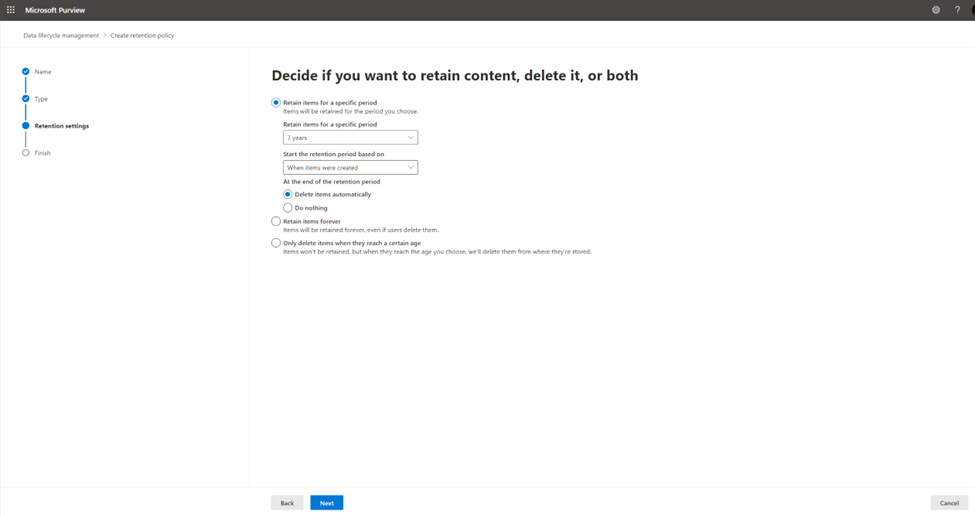
For the start of the retention period, you can choose when the items were created or, when the items were last modified.
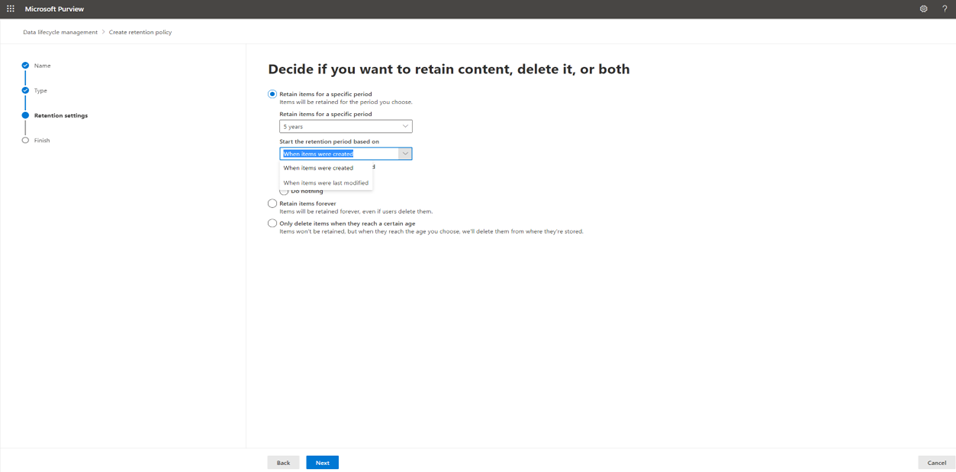
Complete the configuration and save your settings.
Would you like to learn more about our services? Email [email protected] or call 289-803-9730. We would be happy to share more details about our self-service or fully managed eDiscovery services!


